Setup an organisation on GupShup
5 minute read
Beginner
For a GupShup account, you will also need
1. [Facebook verification process for WA business API](https://glific.github.io/docs/docs/Onboarding/Facebook%20verification%20process%20for%20WA%20business%20API/)
- A new phone number or an phone number that hasn’t been used with WhatsApp(**). The sim card should be activated with a minimal plan so as to receive sms verification code/call from Gupshup
To dis-associate your phone number from WhatsApp you need to open WhatsApp on your phone. Go to Settings → Account → Delete my account. Note - simply uninstalling the app does not** remove the association between the phone number and WhatsApp.
There are 2 ways to proceed with your gupshup account. You will need to make that choice at step #13 in the documentation below.
- Traditional Flow : Here is a video from gupshup that outlines the process for going live with "Traditional Flow" . You would do this if you have a verified Meta Business Manager account.
- FaceBook Embedded Flow : If your Meta Business Account is not verified you may have to choose the "Embedded Flow".
Here is useful documentation from Gupshup.io that helps you understand the difference between the two.
TIP: To check if your Facebook Business Manager Account is verified, log in as admin into your Meta/Facebook Business Account at business.facebook.com. You need to select your business in the dropdown at the top left (it may be default) ; Using the left menu go to Settings-> More Business Settings -> Security Center to check verified status.
Create your GupShup Account
Note :- This is a Self-Service step. No need to contact to Gupshup for this. Gupshup may take the route of enterprise Gupshup setup, which is not useful and not required for Glific SAAS service.
- Go to https://www.gupshup.io/ and Click on Login and then Click on sign up here link. Note: Please create an account such that it is shareable with other team members. Because GupShup doesn't allow multiple team members on one account.
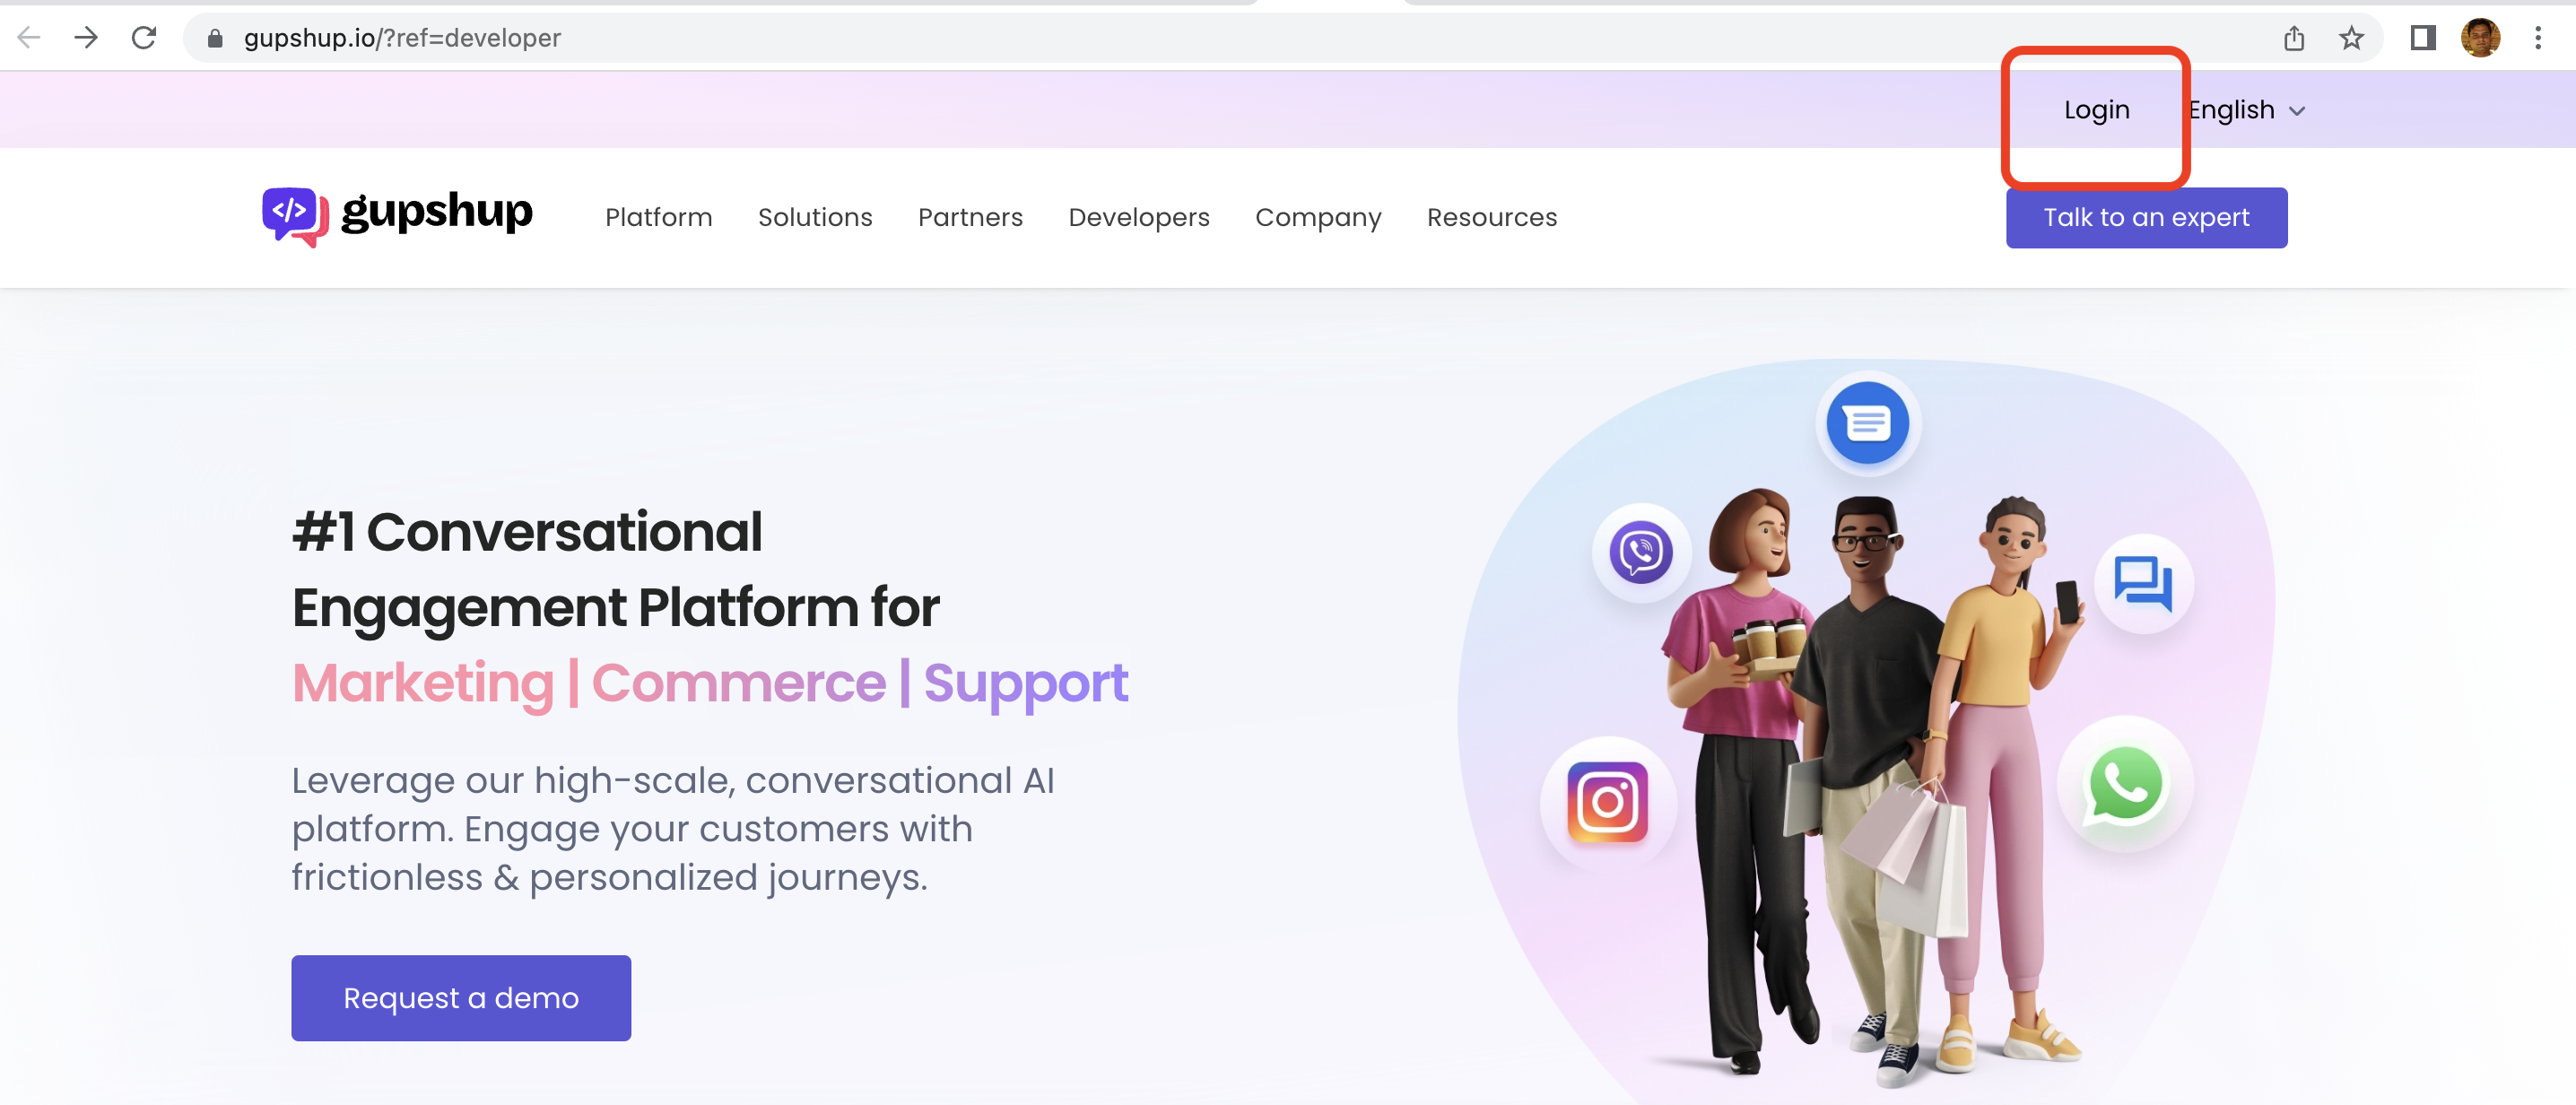


2 . After Signup access and click on the login link
- Enter your email and password. Or use Google/FB account to login.

For an NGO organization, the preferred option would be Google (using your G Suite email id) or Facebook (your NGO Facebook page).
If it does not redirect you go to the WhatsApp dashboard you can also use this link. https://www.gupshup.io/whatsappassistant/#/whatsapp-dashboard
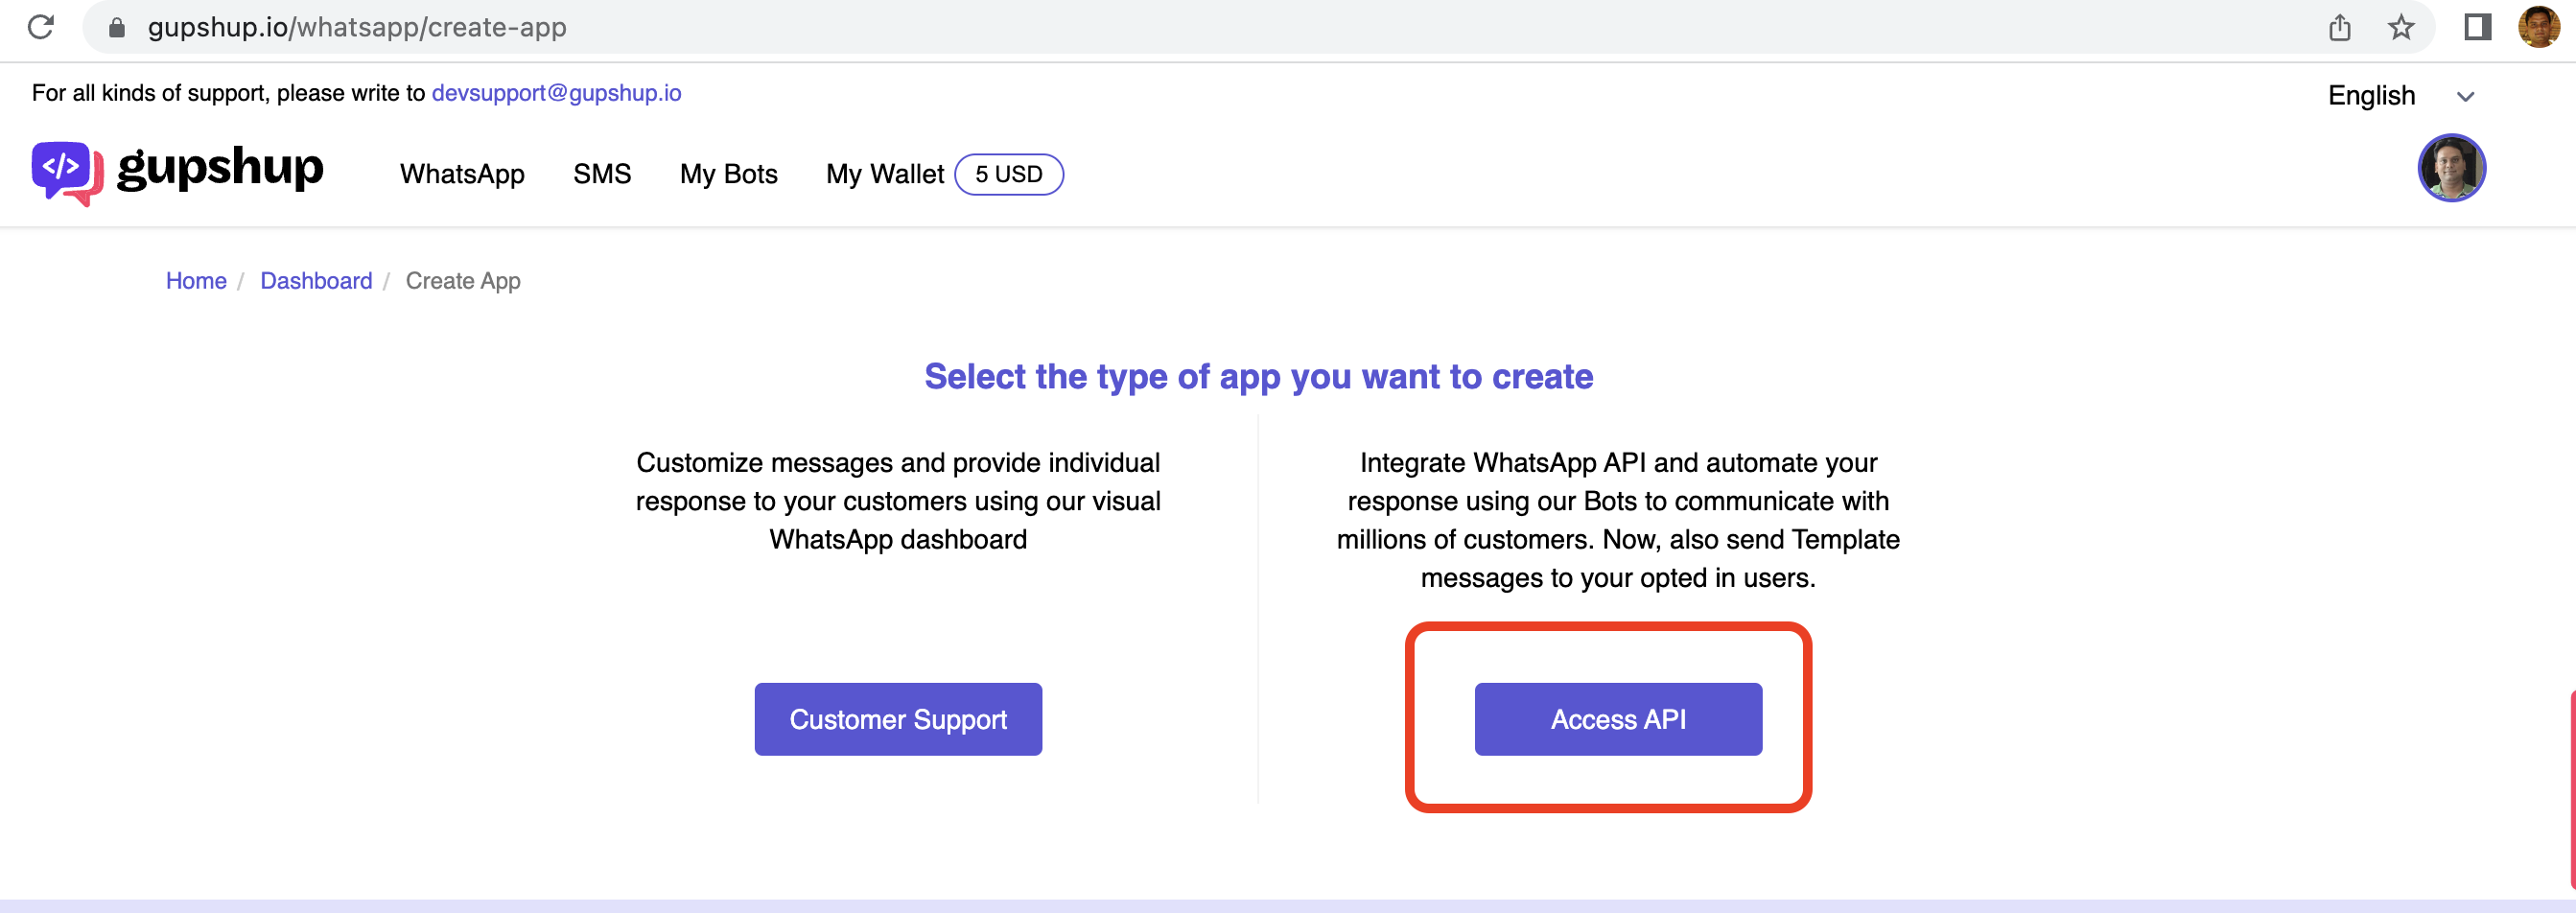
Click on the
+Create Appbutton on the WhatsApp dashboard screen in the right top corner.

6 . CreateApp page will open up. Click on select Access API button.
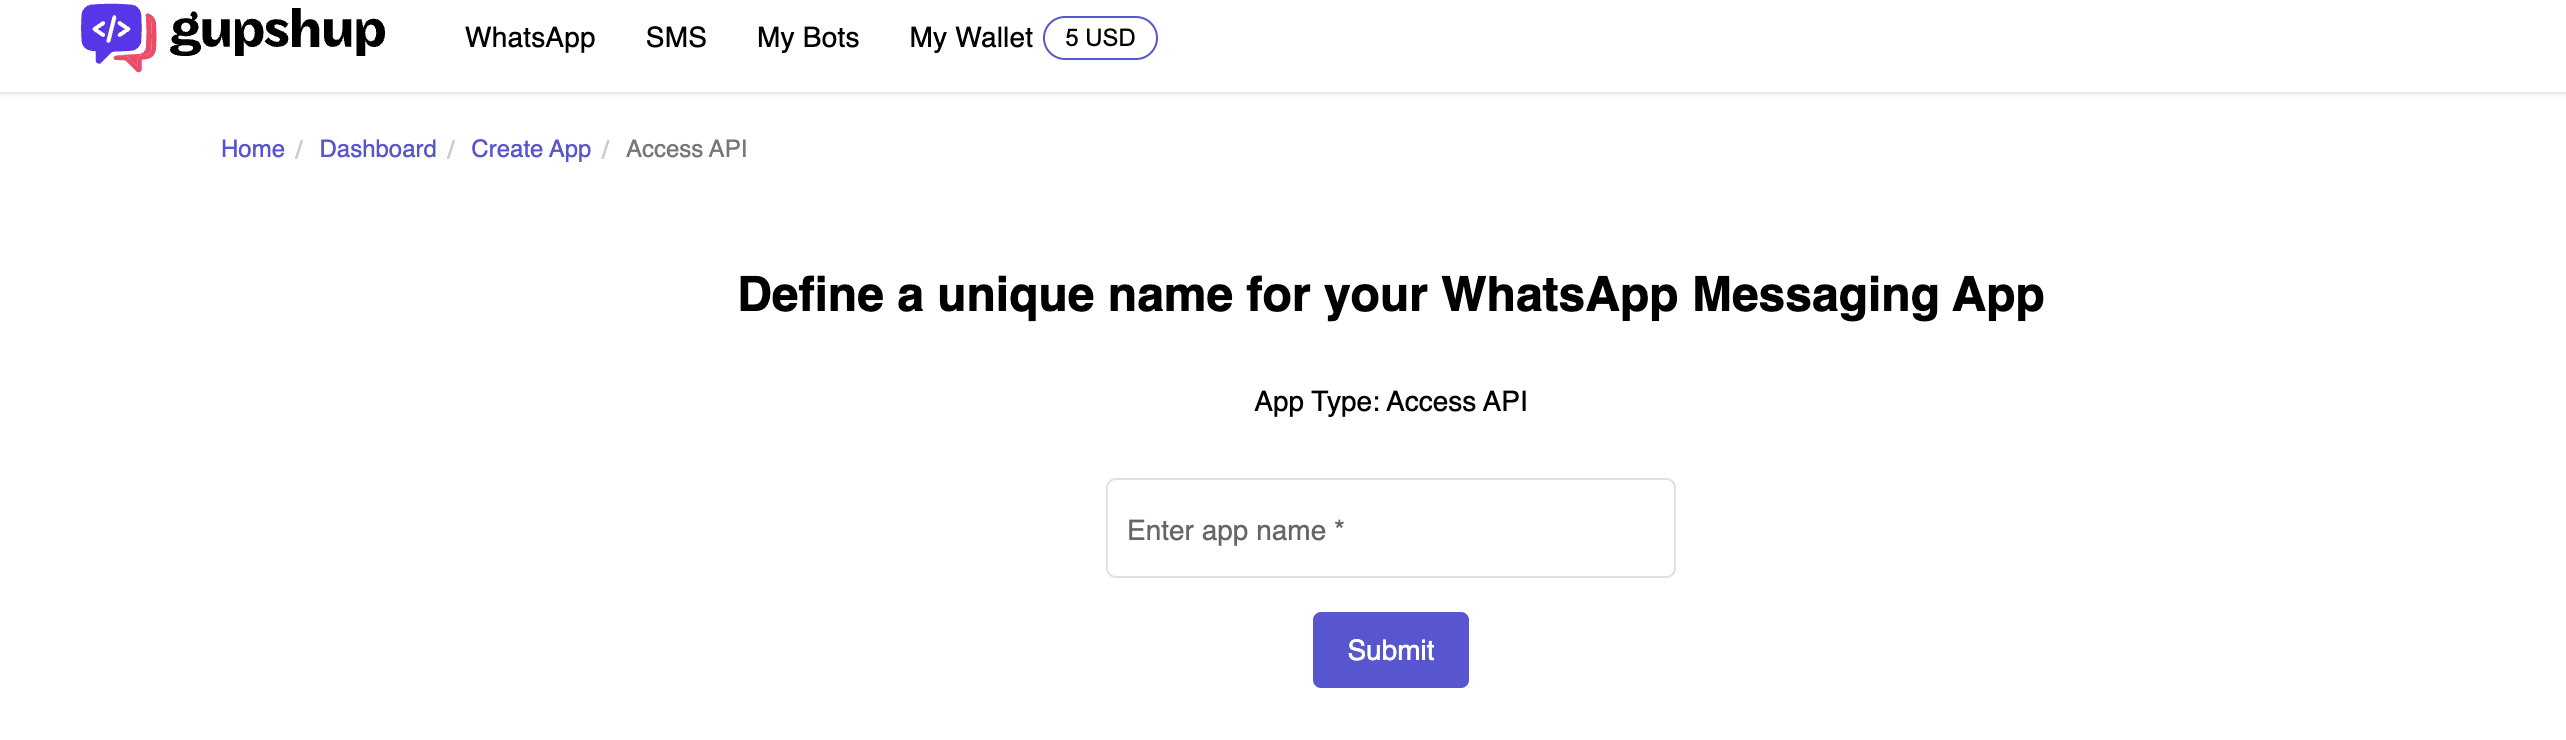
- Enter your organization name and create the app. The name of the app could be your org name or initials or any variations like organization name or abbreviation (CC, ILP, SoL, etc).
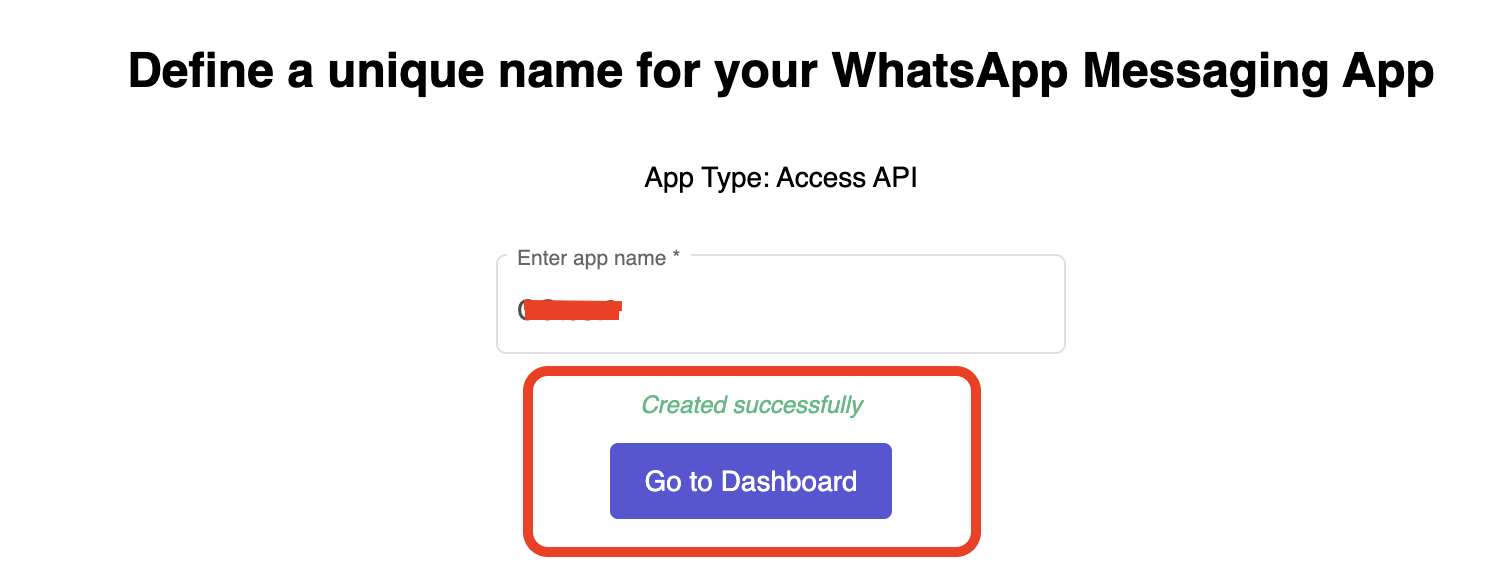
- Click on Go To Dashboard button.
- Click on GO LIve Button
8 . Click on
Onboarding mechanismsdropdown arrow. And scroll down.

a) Disable Automated opt-in message.

- It will redirect to the stage 2 page. Scroll to the bottom and click on
nextbutton.

10 . Step 3 page. Enable template messaging.

11 . Scroll down and click on Go To dashboard button

12 . After creating the app you will be redirected to the what app dashboard(image below). Click on the Go live button.

13 . It will ask to select one of the options. Select Go Live with Traditional Gupshup Flowand then select New Number and then click on confirm button


14 . It will ask to if you are ready to setup your business details. Click on I am ready button

15 . Enter the country and scroll down to click on proceed button


- Fill in all your general details and your email id (on which you will receive verification email), office address, etc... (All the details should match your Facebook manager account) and then click on
next.

- Verify your account via the verification email and click
confirm.

- Then it will ask for your Facebook business manager id. You can get it from here. Enter your FMId and click on confirm.

- After that it will ask you to add a Facebook Business manager ID and then it will ask a new chatbot number. Enter the number and click on
save.


After adding the chatbot number, Gupshup mentions that they take 2-7 days to verify your Facebook manager ID.
Go to your Facebook manager and accept the request from the request screen. (It should show on this screen below).

- Now go to your Gupshup account again and verify the mobile number via OTP or a call (image as shown in point 9).

After verification, you will be live on Gupshup.
To set up Glific, you’ll need to send us the following details at https://prod.glific.com/organization-registration
App Name
GupShup account phone number
API key - Go to Gupshup, Click on the right corner top click on it and copy the API key and paste it in the Glific form
Click on continue button.

25 . Fill the details in the form and click on Get startedbutton.

26 . Go to Home>> Dashboard >> Profile Settings on Gupshup page and click on your profile image to get your API key.

- Update the Gupshup settings with a
callback URL, on the settings page. To reach faster, search for callback: (message us to provide you with the callback URL to add)

- Please make sure your option to send template messages is enabled (see below).

29 . Approve the OTP HSM for your registration and other OTP requirements. Follow the steps below:
1. Click on the `View templates` button

b. Click on the Add morebutton

c. Find the OTP template and click on Submit for Approval.


d. Now Click on Submit. It will take a couple of hours to get approved.

30 . Turn off the automated opt-in message option (refer to the image below ), so that users will not get optin message when they send the message for the first time. Glific provides an easier way to get optin preferences from a flow. Refer Configure Optin & Optout preferences in Glific for more details.


Configure Read Receipts in the Gupshup Account
Please refer to Configure read receipts in Gupshup account for detailed steps.
If you're done with this step and want to get started with Glific, you may also check out the onboarding steps here.